Picture this.
You finally decide to build a home gym. You order that shiny new treadmill, the adjustable dumbbells, maybe even a fancy cable machine. It arrives. You set it up. You use it enthusiastically for three weeks.
Then life happens.
Six months later, the treadmill holds laundry. The dumbbells gather dust. The cable machine becomes an elaborate coat rack.
Sound familiar? You’re not alone.
Studies suggest that around 40% of home exercise equipment ends up unused within the first year. That’s not a willpower problem—it’s a planning problem. Most people buy based on excitement rather than strategy.
This guide takes a different approach. No hype. No pressure. Just practical advice about the home gym equipment that actually gets used—and the stuff worth skipping entirely.
Whether you’re converting a spare bedroom, claiming a garage corner, or squeezing exercise equipment into a tiny apartment, you’ll find options here that fit your space, budget, and goals.
Ready to build something you’ll actually use?
Let’s go.
Before You Buy Anything: The Questions That Actually Matter
Here’s where most home gym purchases go wrong.
People start by browsing Amazon or walking into a sporting goods store. They see impressive machines, read promising reviews, and buy based on what looks good rather than what fits their life.
Three months later? Half that exercise equipment sits untouched.
Before spending a single dollar, answer these questions:
What’s your actual goal?
- Losing weight? (Cardio equipment matters most)
- Building muscle? (Strength training gear is essential)
- General fitness? (You need variety)
- Stress relief? (Consider what you’ll genuinely enjoy)
How much space do you really have?
- Measure. That “spacious” garage corner might be smaller than expected.
- Remember: you need room around equipment, not just for it.
What’s your realistic budget?
- Include accessories, flooring, and potential maintenance
- Quality home fitness equipment costs more upfront but lasts longer
What have you actually enjoyed in the past?
- Hated running? Skip the treadmill.
- Loved cycling classes? A bike makes sense.
- Never stuck with strength training? Start simple.
Your answers shape everything. A powerlifter’s home gym looks nothing like a yoga enthusiast’s. Neither is wrong—they’re just different.
Now let’s talk equipment.
The 12 Best Exercise Equipment Picks for Home Gyms
1. Adjustable Dumbbells: The Non-Negotiable Foundation
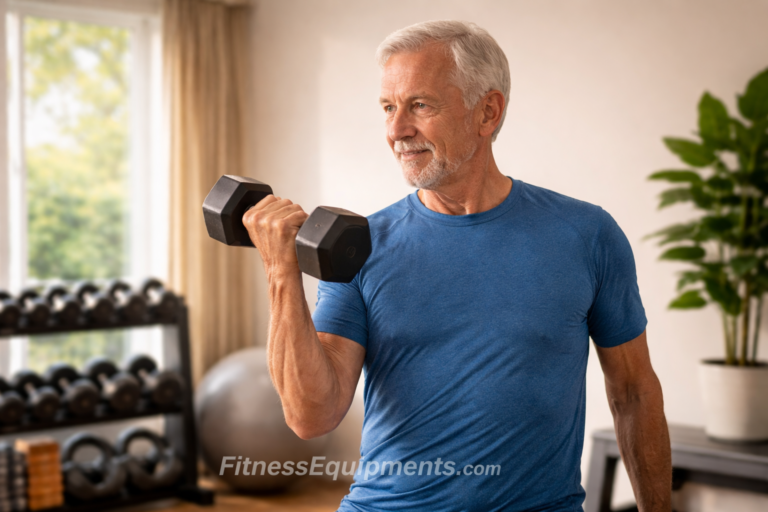
If there’s one piece of exercise equipment that belongs in every home gym, adjustable dumbbells make the strongest case.
A single compact set replaces an entire rack of individual weights. One dial turn or pin slide switches from 5-pound rehabilitation exercises to 50+ pound serious strength work. The space savings alone justify the investment.
Why they’re essential:
Dumbbells are arguably the most versatile strength training tool available. Chest press. Rows. Shoulder work. Bicep curls. Lunges. Deadlifts. Core exercises. The movement options are nearly endless.
Unlike machines that lock users into fixed movement patterns, dumbbells require stabilization. Muscles work harder. Coordination improves. Results multiply.
What to look for:
- Weight range that matches current strength AND future goals
- Smooth adjustment mechanism (you’ll use it constantly)
- Comfortable grip that won’t slip when hands get sweaty
- Durable construction—cheap sets break quickly
What often gets overlooked:
Quality adjustable dumbbells aren’t cheap. Expect $300-$600 for a solid set. But consider this: a comparable collection of individual dumbbells would cost twice as much and require ten times the space.
Best for: Everyone. Beginners through advanced lifters.
2. Power Rack (or Squat Stand): The Strength Training Centerpiece
Building real strength at home requires somewhere to safely lift heavy things.
A power rack—sometimes called a squat cage—provides exactly that.
Four vertical posts. Adjustable safety bars. J-hooks to hold a barbell. This simple structure enables squats, bench press, overhead press, and dozens of other exercises without a spotter. The safety bars catch the weight during failed reps.
Why it matters:
Without a rack, heavy barbell training becomes dangerous. Users are either limited to weights they can easily control or risking injury every session. Neither option leads to serious progress.
Space-saving alternative:
Don’t have room for a full rack? Squat stands (also called squat racks) provide similar functionality in a smaller footprint. They sacrifice some stability and safety features, but for most home gym users, they’re plenty sufficient.
What to look for:
- Weight capacity well above what you’ll actually lift
- Hole spacing of 2 inches or less (for precise safety bar positioning)
- Sturdy construction that doesn’t wobble
- Pull-up bar attachment (built into most racks)
Budget consideration:
Power racks range from $200 for basic models to $2,000+ for commercial-grade equipment. For most home gym users, $400-$700 buys excellent quality that’ll last decades.
Best for: Anyone serious about strength training with barbells.
3. Barbell and Weight Plates: The Classic Combo
Once you have a rack, you need something to put on it.
A quality barbell and set of weight plates remain the gold standard for building strength. Gyms worldwide still center around this equipment for good reason—it works.
Olympic vs. Standard:
Olympic barbells (7 feet long, 45 pounds) are the industry standard. They’re more expensive but significantly more durable and hold more weight. Standard barbells (shorter, lighter) work for beginners but limit long-term progress.
Plates to start with:
Most home gym users do well beginning with:
- 2 x 45 lb plates
- 2 x 25 lb plates
- 2 x 10 lb plates
- 2 x 5 lb plates
- 2 x 2.5 lb plates
That’s 185 pounds total—enough for most beginners to progress for months before needing more.
The upgrade path:
Bumper plates (rubber-coated) allow safe weight drops during Olympic lifts or failed reps. They’re quieter, protect floors, and look great. They also cost significantly more than iron plates.
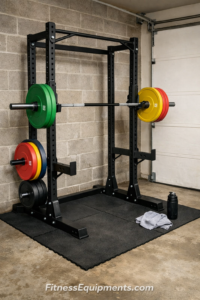
Best for: Compound strength exercises (squats, deadlifts, bench press, rows, overhead press).
4. Adjustable Weight Bench: Your Versatility Multiplier
A flat bench is fine. An adjustable bench is transformational.
With incline, decline, and flat positions, a single adjustable bench multiplies exercise options dramatically. Incline presses target upper chest. Decline positions emphasize lower chest. Seated positions enable shoulder work. The variations are extensive.
What to look for:
- Multiple angle adjustments (not just flat and one incline)
- Sturdy construction that doesn’t wobble at any angle
- Comfortable but firm padding
- Appropriate weight capacity (your body weight plus whatever you’re lifting)
- Compact fold for storage (if space is limited)
What many people miss:
Bench height matters. Too tall, and feet won’t plant firmly during bench press. Too short, and setup feels awkward. Standard bench height is around 17-18 inches—check before purchasing.
Budget range: $150-$500 for quality options.
Best for: Chest exercises, seated shoulder work, supported rows, step-ups, and dozens of other movements.
5. Pull-Up Bar: Maximum Results, Minimum Investment
Pull-ups are humbling. Most people can’t do many—if any—when they start.
That’s exactly why a pull-up bar belongs in every home gym.
This simple piece of exercise equipment delivers extraordinary back, bicep, and core development. Bodyweight pulling movements build functional strength that transfers to everyday life.
Your options:
Doorway bars: Cheapest ($20-$50), no installation required, removable. Limitations: weight capacity concerns, potential door frame damage, limited grip options.
Wall-mounted bars: More secure, higher weight capacity, permanent installation required. Great for dedicated gym spaces.
Rack-mounted: If you bought a power rack, you likely already have one built in. Best option for serious training.
Can’t do a pull-up yet?
That’s normal. Progression options include:
- Assisted pull-ups using resistance bands
- Negative pull-ups (jumping up, lowering slowly)
- Inverted rows on a lower bar
- Lat pulldown machines (though these cost significantly more)
Best for: Back development, bicep strength, core stability, grip strength.
6. Cardio Equipment: Choose One You’ll Actually Use
Here’s where most home gym dreams go to die.
Someone buys a treadmill because “cardio is important.” They use it enthusiastically for three weeks. Then occasionally for another month. Then it becomes furniture.
The problem isn’t cardio equipment. The problem is buying the wrong cardio equipment for specific personalities and preferences.
Your main options:
Treadmill: Best for dedicated runners who’ll use it regardless of weather. Not ideal for people who find running boring. Space-hungry and often noisy.
Stationary bike (upright or recumbent): Lower impact than running, easier on joints, quieter operation. Great for multitasking (reading, watching shows). Recumbent versions suit those with back issues.
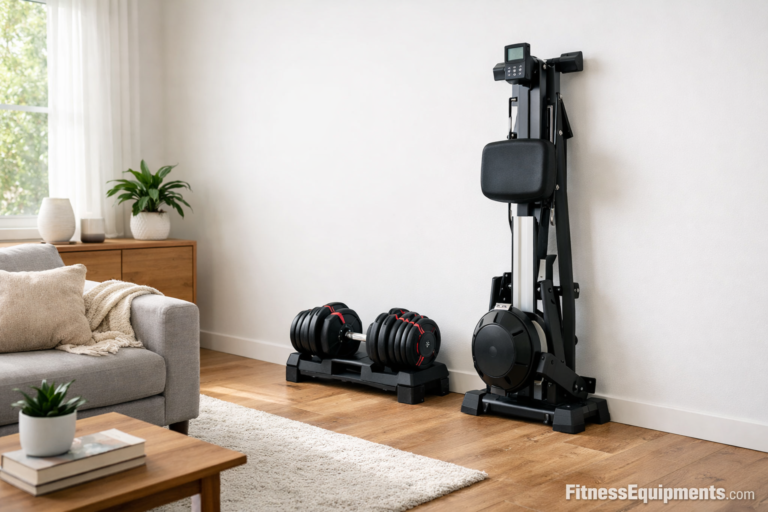
Rowing machine: Full-body workout combining cardio and strength. Excellent calorie burn. Requires technique learning but folds compactly for storage.
Elliptical: Low impact, full-body movement, quiet operation. Larger footprint than bikes but gentler on joints than treadmills.
Air bike (assault bike): Brutal, effective, compact. The harder you push, the harder it pushes back. Not for casual exercisers.
The key insight:
Pick the one you’ll actually use. Not the one that burns the most calories theoretically. Not the one your friend loves. The one that fits your personality, your space, and your lifestyle.
One piece of cardio equipment used consistently beats three pieces collecting dust.
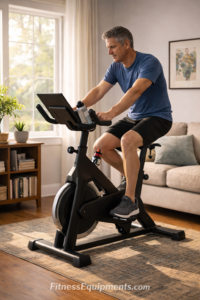
Best for: Cardiovascular health, calorie burn, warm-ups, active recovery.
7. Kettlebells: Compact Power for Dynamic Training
Kettlebells look like cannonballs with handles. They train like nothing else.
Unlike dumbbells—which excel at slow, controlled movements—kettlebells shine during dynamic, swinging exercises. Kettlebell swings, snatches, cleans, and Turkish get-ups build explosive power, cardiovascular conditioning, and full-body strength simultaneously.
Why they deserve space in your home gym:
Twenty minutes of kettlebell swings delivers cardio and strength training together. For time-crunched exercisers, this efficiency is invaluable. The compact size means they fit anywhere—even tiny apartments.
Starting weights:
- Most women: 15-25 lb kettlebell
- Most men: 25-40 lb kettlebell
- Start lighter than ego suggests
Building a collection:
Unlike dumbbells, you don’t need many kettlebells. Three weights (light, medium, heavy for your ability level) cover most training needs. Add more as you progress.
Quality matters:
Cheap kettlebells have rough handles that destroy hands and inconsistent weights that mess with training. Spending a bit more for smooth, accurate, well-balanced bells pays off quickly.
Best for: Full-body conditioning, explosive power, time-efficient workouts, small spaces.
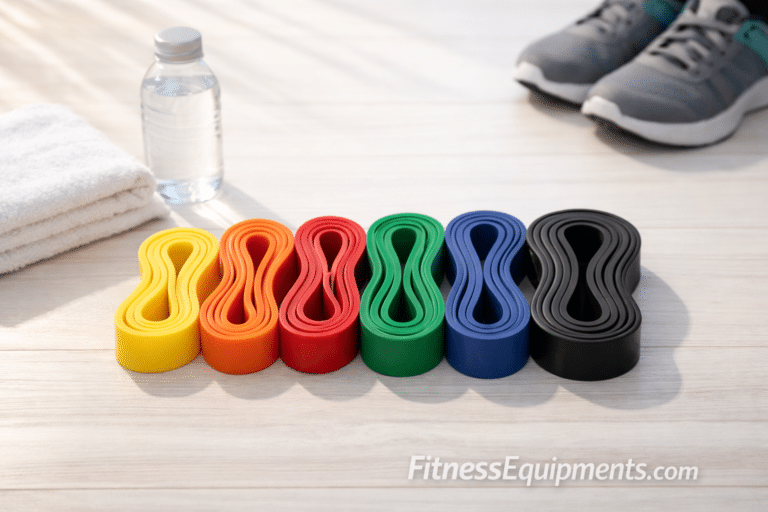
8. Resistance Bands: The Most Underrated Home Gym Equipment
Resistance bands often get dismissed as toys. Something for beginners or rehabilitation patients. Not “real” exercise equipment.
That perception is completely wrong.
Why bands deserve respect:
Variable resistance. Unlike weights—which feel heaviest at certain points in each movement—bands create increasing tension throughout the entire range of motion. This challenges muscles differently and promotes growth.
Versatility. Pull-aparts. Face pulls. Assisted pull-ups. Added resistance for squats and deadlifts. Mobility work. Warm-ups. Recovery. One set of bands serves dozens of purposes.
Portability. Throw them in a suitcase. Use them in hotel rooms. Train anywhere.
Types to consider:
Loop bands: Circles of flat rubber in various thicknesses. Great for lower body work and assistance exercises.
Tube bands with handles: More comfortable for upper body pulling and pressing movements.
Long resistance bands: Useful for assisted pull-ups and heavy compound movements.
Investment required: $20-$50 for a complete set covering all resistance levels.
Best for: Supplementing other equipment, warm-ups, mobility work, travel, rehabilitation, adding variety.
9. Foam Roller and Mobility Tools: The Recovery Essentials
Here’s what separates people who build long-term fitness habits from those who burn out within months:
Recovery.
Training breaks the body down. Recovery builds it back stronger. Skip recovery, and fatigue, tightness, and eventually injury accumulate.
Foam rollers and mobility tools aren’t glamorous. They won’t impress anyone on Instagram. But they might be the most important exercise equipment in any home gym.
Essential recovery tools:
Foam roller: Self-massage for major muscle groups. Releases tension, improves blood flow, reduces soreness. Standard density suits most users; firm density for experienced athletes.
Lacrosse ball: Targets smaller areas that foam rollers can’t reach—feet, glutes, upper back trigger points.
Massage gun: Powered percussion therapy. More expensive ($100-$400) but more effective for deep tissue work. Not essential but increasingly popular.
Stretching strap: Assists with flexibility work, especially hamstrings and shoulders.
What rarely gets mentioned:
Nobody gets excited about foam rolling. But spending 10 minutes on recovery work after each session dramatically improves how you feel, how you perform, and how long you can sustain training.
Best for: Everyone who plans to exercise consistently long-term.
10. Suspension Trainer (TRX-Style): Bodyweight Amplified
Suspension trainers—TRX being the most famous brand—use two adjustable straps anchored above you. Simple design, extraordinary versatility.
By changing body angle relative to the anchor point, difficulty adjusts instantly. Lean back slightly for an easy row. Get nearly horizontal for an extremely challenging one. Same straps, same movement, completely different intensity.
Why home gym users love them:
Hundreds of exercise variations from a single piece of equipment that weighs almost nothing and stores anywhere. For small spaces, this efficiency is unmatched.
Bodyweight training with suspension adds instability, forcing core engagement during every movement. Stabilizer muscles work overtime.
Learning curve:
Suspension training requires some technique learning. Movements feel different than traditional exercises. But most people adapt within a few sessions, and the variety keeps workouts interesting indefinitely.
Installation options:
- Door anchor (included with most systems)
- Ceiling mount (more secure, requires installation)
- Outdoor anchor around trees or poles
Budget: $30 for basic knockoffs, $150-$200 for quality branded systems.
Best for: Small spaces, travel-friendly training, bodyweight progressions, core development.
11. Plyo Box: Simple Tool, Explosive Results
A plyo box is literally just a sturdy box you can jump onto.
Simple? Yes. Effective? Absolutely.
Box jumps develop explosive lower body power that transfers to sports, daily life, and other exercises. Step-ups provide lower-impact alternatives. Box squats help develop strength from a dead stop. The variations expand far beyond basic jumps.
What to look for:
3-in-1 foam boxes: Softer landing surface, three height options by rotating the box, less intimidating for beginners worried about shin scrapes. Slightly less stable than wooden boxes.
Wooden boxes: More traditional, extremely durable, stable surface. Available in fixed heights or stackable designs. Less forgiving on missed jumps.
Height considerations:
Most users need 20-24 inch boxes. Beginners should start lower (12-16 inches) and progress gradually. Advanced athletes might want 30+ inches.
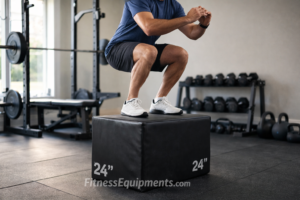
Best for: Explosive power, athletic performance, warm-ups, conditioning circuits.
12. Flooring: The Forgotten Foundation
This isn’t technically exercise equipment. But ignoring flooring is one of the biggest home gym mistakes people make.
Why flooring matters:
Protection: Dropped weights damage floors. Rubber flooring absorbs impact.
Safety: Rubber provides traction that prevents slipping during dynamic movements.
Noise reduction: Downstairs neighbors (or family members) will appreciate this.
Comfort: Standing on concrete for an hour-long workout destroys feet and joints.
Equipment protection: Rubber flooring extends equipment life by cushioning impacts.
Options:
Horse stall mats: The budget-friendly favorite. Available at farm supply stores for around $45 per 4×6 foot mat. Dense, durable, effective. Slight rubber smell initially.
Interlocking gym tiles: More expensive but easier to install and customize. Various thicknesses for different needs.
Rolled rubber flooring: Professional appearance, seamless installation, highest cost.
Minimum recommendation:
At least cover the area where weights get dropped. Even a single 4×6 mat under a lifting platform protects floors and reduces noise significantly.
Best for: Every home gym, regardless of other equipment choices.
Building Your Home Gym: Practical Approaches by Budget
Not everyone has unlimited money. Here’s how to prioritize based on realistic spending limits.
The Starter Setup ($200-$400)
Testing the waters. Effective home gym equipment without major financial commitment.
Buy these:
- Adjustable dumbbells (lighter set or used)
- Pull-up bar (doorway style)
- Resistance band set
- Foam roller
This covers strength training basics, pulling movements, and recovery. An impressive physique is achievable with just these tools.
The Solid Foundation ($800-$1,500)
Committed. Real home gym equipment that’ll last years.
Buy these:
- Quality adjustable dumbbells (full weight range)
- Adjustable weight bench
- Squat stands or basic power rack
- Olympic barbell and starter plate set
- Pull-up bar (wall-mounted or rack-attached)
- Resistance bands
- Foam roller and lacrosse ball
- Basic flooring for lifting area
This setup handles 90% of what most people need. Strength training, muscle building, and general fitness are all covered.
The Complete Home Gym ($2,500-$5,000)
All in. A home gym that rivals commercial facilities.
Buy these:
- Everything from the Solid Foundation, upgraded
- Full power rack with attachments
- Comprehensive plate collection (including bumper plates)
- One quality cardio machine
- Kettlebell set
- Suspension trainer
- Plyo box
- Cable machine or functional trainer (if space allows)
- Full rubber flooring
- Mirrors
- Quality lighting and ventilation
This setup eliminates any need for a commercial gym membership.
Common Home Gym Mistakes to Avoid
Buying based on sales, not needs.
That amazing deal on a leg press machine doesn’t matter without room for it or interest in using it. Sales create urgency. Urgency leads to regret.
Ignoring quality for price.
Cheap exercise equipment breaks, wobbles, and frustrates. Usage stops. Then it’s not cheap—it’s wasted money. Buy less, buy better.
Overcomplicating early.
Forty-seven machines aren’t necessary for fitness. Master the basics with fundamental equipment before adding specialty items.
Forgetting about ceilings.
That power rack looks perfect until overhead press becomes impossible because the ceiling is too low. Measure vertical space, not just floor space.
Skipping the boring stuff.
Flooring. Mirrors. Lighting. Ventilation. None of it is exciting. All of it affects whether you’ll actually enjoy spending time in your gym.
Making Your Home Gym Actually Work
Owning exercise equipment means nothing. Using it means everything.
Make it inviting.
The gym space should feel welcoming, not punishing. Good lighting. Decent temperature. A speaker for music. Maybe a fan. Small comforts add up.
Remove friction.
The easier starting a workout feels, the more likely it happens. Lay out clothes the night before. Keep equipment accessible. Eliminate excuses before they form.
Start embarrassingly small.
Fifteen minutes beats zero minutes. Always. Build the habit first, then increase duration. Consistency defeats intensity over time.
Track something.
Write down what you lift. Note which workouts you complete. Seeing progress—even small progress—fuels motivation.
Give yourself permission to change.
Bought a treadmill and hate it? Sell it. Get something else. Home gyms should evolve as you learn what actually works for you.
Final Thoughts: Building Something You’ll Use
Here’s what years of fitness industry data consistently show:
The best exercise equipment is equipment that actually gets used.
Not the equipment with the best reviews. Not the equipment fitness influencers promote. Not the equipment that looks most impressive. The equipment that fits your life, your goals, and your personality.
Start smaller than feels necessary. Buy quality over quantity. Leave room to grow. And remember—the goal isn’t having a home gym. The goal is becoming someone who uses one.
You’ve got this.