Picture this: you’ve got a gym bag full of equipment, a membership you barely use, and a workout routine that feels more like a chore than a habit. Sound familiar? That’s where Theraband resistance bands come in — and they might just change everything about how you think about training.
Whether you’re recovering from an injury, squeezing in a workout between meetings, or building a home gym that doesn’t require a second mortgage, Theraband resistance bands offer something most equipment can’t: real results in a remarkably flexible format.
This guide covers everything you need to know — from choosing the right band to the exercises that actually make a difference — so you can stop overthinking and start moving.
What Are Theraband Resistance Bands?
Theraband is one of the most recognized names in resistance training, and for good reason. Originally developed for physical therapy and rehabilitation, Theraband resistance bands have crossed over into mainstream fitness in a big way.
Unlike traditional weights, resistance bands create tension throughout the entire range of motion — meaning your muscles are working on the way up and the way down. That’s what exercise scientists call “constant tension,” and it’s one of the reasons bands can be surprisingly challenging even at lighter resistance levels.
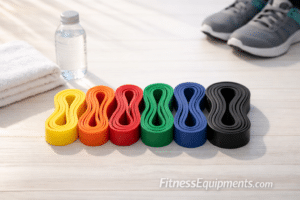
Theraband bands come in a color-coded system that indicates resistance level, making it easy to progress over time without guesswork. From the lightest yellow band all the way up to the heaviest gold, there’s a resistance level for every starting point.
[Internal link placeholder: Link to beginner resistance training guide]
Why So Many People Are Switching to Theraband Resistance Bands
Here’s what most people miss when they compare bands to dumbbells or machines: resistance bands don’t just work your muscles — they challenge your stability too.
Every pull, press, or squat with a band requires your smaller stabilizing muscles to fire up and keep you balanced. That’s extra work happening in the background, building functional strength that transfers to real life. Moving furniture, playing with kids, carrying groceries — that’s where resistance training actually pays off.
Beyond that, Theraband resistance bands check a lot of practical boxes:
- Affordable — A full set costs a fraction of a home gym setup
- Portable — Toss them in a bag and train anywhere
- Joint-friendly — Lower impact than free weights, especially for beginners or those returning from injury
- Versatile — Dozens of exercises for every muscle group
- Scalable — Easy to increase resistance as you get stronger
What rarely gets mentioned in most reviews? The consistency factor. Because bands are so easy to grab and use, people actually do use them. And consistent, imperfect effort beats perfect workouts you never show up for.
Choosing the Right Theraband Resistance Bands: A Color-by-Color Breakdown
Walking into a fitness store and staring at a wall of colorful bands can feel overwhelming. Don’t let it be. The Theraband color system is actually your friend once you know what you’re looking at.
Theraband Resistance Levels Explained
| Color | Resistance Level | Best For |
|---|---|---|
| Yellow | Extra Light | Beginners, upper body rehab |
| Red | Light | General beginner training |
| Green | Medium | Intermediate lower and upper body |
| Blue | Heavy | Intermediate to advanced |
| Black | Extra Heavy | Advanced training |
| Silver | Super Heavy | Strength-focused athletes |
| Gold | Max | Elite resistance needs |
A common mistake is starting too heavy. Many people reach for a blue or black band right away, only to find their form breaks down and the exercise stops being effective. Starting with a lighter band and nailing the movement pattern first is the smarter play.
A good rule of thumb: If you can’t complete 12–15 reps with good form, drop down a level. If 20 reps feels easy, it’s time to go heavier.
[Internal link placeholder: Link to resistance band progression guide]
Flat Bands vs. Loop Bands: Which Theraband Resistance Band Is Right for You?
Theraband makes a few different styles, and the right choice depends on what you’re training for.
Flat resistance bands (the classic long strip) are incredibly versatile. You can wrap them around a door, anchor them to equipment, fold them for more resistance, or use them for stretching and mobility work. These are the original Theraband design and still the most popular for general use.
Loop bands (also called mini bands) are shorter and closed in a loop. They’re excellent for lower body work — lateral walks, clamshells, glute bridges — and are a staple in physical therapy for hip and knee rehabilitation.
Not sure which to start with? A flat band gives you more versatility for the money, especially if you’re new to resistance training.
7 Theraband Resistance Band Exercises That Actually Deliver Results
Here’s the part most guides rush through — but it’s really the heart of the whole thing. Having the right band matters. Knowing what to do with it matters more.
These seven exercises cover your full body and can be scaled to any fitness level using the Theraband color system.
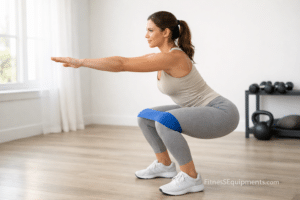
1. Banded Squat
Place the band just above your knees, stand hip-width apart, and squat down as if sitting into a chair. The band challenges your glutes and hips to stay active throughout the movement — which is exactly what most people’s glutes need.
Why it matters: Strong glutes support your lower back, improve your posture, and protect your knees. This one exercise works all three.
2. Theraband Resistance Band Row
Anchor your band at chest height (a door anchor works great here), step back to create tension, and pull the band toward your ribcage. Keep your elbows close to your body and squeeze your shoulder blades together at the end.
This is a fantastic exercise for counteracting the forward hunch that comes from too much sitting. It targets the mid-back, rear delts, and biceps all at once.
3. Glute Bridge with Resistance Band
Lie on your back with knees bent, band across your hips held in place by your hands, and press your hips toward the ceiling. Hold briefly at the top and lower slowly.
Here’s what most people miss: The slow lowering phase — the eccentric — is where a big chunk of the strengthening happens. Don’t rush it.
4. Lateral Band Walk
Place a loop band just above your ankles or knees, get into a slight squat position, and step side to side. Keep tension in the band throughout. It sounds simple. It burns more than expected.
This exercise is a staple in physical therapy because it directly targets the hip abductors — muscles that play a huge role in knee stability and injury prevention.
[Internal link placeholder: Link to hip strengthening exercises]
5. Standing Chest Press
Anchor the band behind you at chest height, step forward to create tension, and press both arms forward. This mimics a chest press without any equipment beyond the band and an anchor point.
Progression tip: The further you step away from the anchor, the harder the exercise becomes. Use your feet to self-regulate the difficulty.
6. Theraband Resistance Band Bicep Curl
Stand on the center of the band, hold both ends with palms facing up, and curl your hands toward your shoulders. Control the lowering phase — that’s where much of the work happens.
A commonly reported issue with band curls is that people let the band snap back too quickly. Slow it down, and the exercise becomes significantly more effective.
7. Pallof Press (Anti-Rotation Press)
Anchor the band at chest height to your side. Hold it with both hands at your chest, then press straight out in front of you. The key is resisting the rotational pull of the band — your core has to work overtime to keep you stable.
Why it matters: Most core exercises train flexion (think: crunches). This one trains stability, which is what your core actually does during real-life movements.
How to Build a Simple Theraband Resistance Band Routine
Exercises are one thing. A routine is what actually gets you results. Here’s a simple three-day-a-week structure that works for most people starting out with Theraband resistance bands.
Day 1 – Lower Body Focus
- Banded Squat: 3 sets × 12–15 reps
- Glute Bridge: 3 sets × 15 reps
- Lateral Band Walk: 3 sets × 12 steps each direction
Day 2 – Upper Body Focus
- Theraband Row: 3 sets × 12 reps
- Standing Chest Press: 3 sets × 12 reps
- Bicep Curl: 3 sets × 15 reps
Day 3 – Full Body + Core
- Banded Squat: 2 sets × 12 reps
- Row: 2 sets × 12 reps
- Pallof Press: 3 sets × 10 reps per side
- Glute Bridge: 2 sets × 15 reps
Rest 48 hours between sessions when possible. As the routine starts feeling manageable — meaning you’re finishing every set without much struggle — that’s the signal to move up a resistance level.
Theraband Resistance Bands for Physical Therapy and Recovery
One of the reasons Theraband became a household name in the first place is its roots in physical therapy. Physical therapists have used these bands for decades because they offer controlled, joint-friendly resistance that’s easy to adjust.
Common applications include:
- Shoulder rehabilitation – Rotator cuff exercises, external rotation drills
- Knee recovery – Terminal knee extensions, straight leg raises
- Hip strengthening – Clamshells, side-lying abduction
- Ankle stability – Dorsiflexion and plantarflexion work post-injury
If you’re dealing with a specific injury or post-surgical recovery, working with a physical therapist who can design a program around your individual needs is worth it. Theraband resistance bands are tools — and like any tool, they work best when used with a plan.
[Internal link placeholder: Link to physical therapy exercise guide]
Caring for Your Theraband Resistance Bands
Resistance bands don’t last forever, but they’ll last a lot longer with basic care. Here’s what’s commonly recommended:
- Store away from direct sunlight – UV exposure degrades latex over time
- Keep them away from sharp edges – A small nick can turn into a snap mid-exercise
- Clean with mild soap and water – Avoid harsh chemicals that break down the material
- Inspect before each use – Look for tears, thin spots, or discoloration
- Replace when in doubt – A snapping band during a workout is no fun for anyone
Most Theraband flat bands are sold in bulk rolls or pre-cut lengths. If you go through bands regularly — as often happens with daily users — buying a roll and cutting your own lengths is cost-effective in the long run.
The Habit That Makes All the Difference
Here’s something worth sitting with: the “best” resistance band workout is the one you actually do consistently. Not the most advanced routine. Not the heaviest band. The one that fits into your life.
Many people find success keeping their bands visible — looped on a doorknob, sitting next to the couch, tucked in a gym bag that stays packed. Out of sight often means out of mind, especially when motivation dips.
A useful mental reframe: think of your band routine the same way you think about brushing your teeth. It doesn’t require inspiration. It doesn’t need a perfect moment. It’s just something you do. Ten minutes of banded exercises three times a week compounds into real, noticeable results over months.
What about the days you skip? Normal. Expected. Not a reason to spiral. Starting over is part of every fitness journey — for everyone, at every level. The only move that actually matters is the next one.
Are Theraband Resistance Bands Worth It? The Bottom Line
Let’s bring it all together. Theraband resistance bands are one of the most practical, research-backed fitness tools available — and they’re not just for beginners. Physical therapists use them in clinical settings. Strength coaches use them to add accommodating resistance to barbell lifts. Athletes use them for warm-ups, activation work, and mobility.
For most people, a set of Theraband flat bands in two or three resistance levels covers virtually every training need. That might run you $20–$40 total. For that investment, you get a full-body training tool that travels anywhere and lasts years with proper care.
If you’ve been putting off getting started with resistance training because it feels complicated or expensive, Theraband resistance bands are a genuinely low-friction way to begin. The barrier is low. The results are real.
Ready to pick your first band? Start one level lighter than you think you need. Get the movement down. Then level up. That’s the process — and it works.
Image Suggestions
Image 1: Flat lay of Theraband resistance bands arranged by color and resistance level Alt text: Theraband resistance bands in multiple resistance levels from yellow to black arranged on a white surface
Image 2: Person performing a banded squat with a Theraband resistance band above the knees Alt text: Woman performing banded squat using Theraband resistance bands for lower body strength training
Image 3: Close-up of Theraband resistance band anchored to a door for rowing exercise Alt text: Theraband resistance band anchored to door for at-home resistance band row exercise
Image 4: Theraband resistance band color chart showing resistance levels Alt text: Theraband resistance bands color chart from extra light yellow to max gold resistance level
External Link
Theraband’s official resistance level specifications — authoritative source for band resistance data and clinical use guidelines. (dofollow)